
Customer details
Contact information
On the top part, you find the information of the customer:

The first icon indicates if it is a person () or a company ().
Next to the (company) name is the customer number.
Beneath this you will find all the contact information and the standard invoice-profile.
You can Delete or Edit the customer.
The Refresh () of the customer can be used when a change is not directly visible.
Agreements
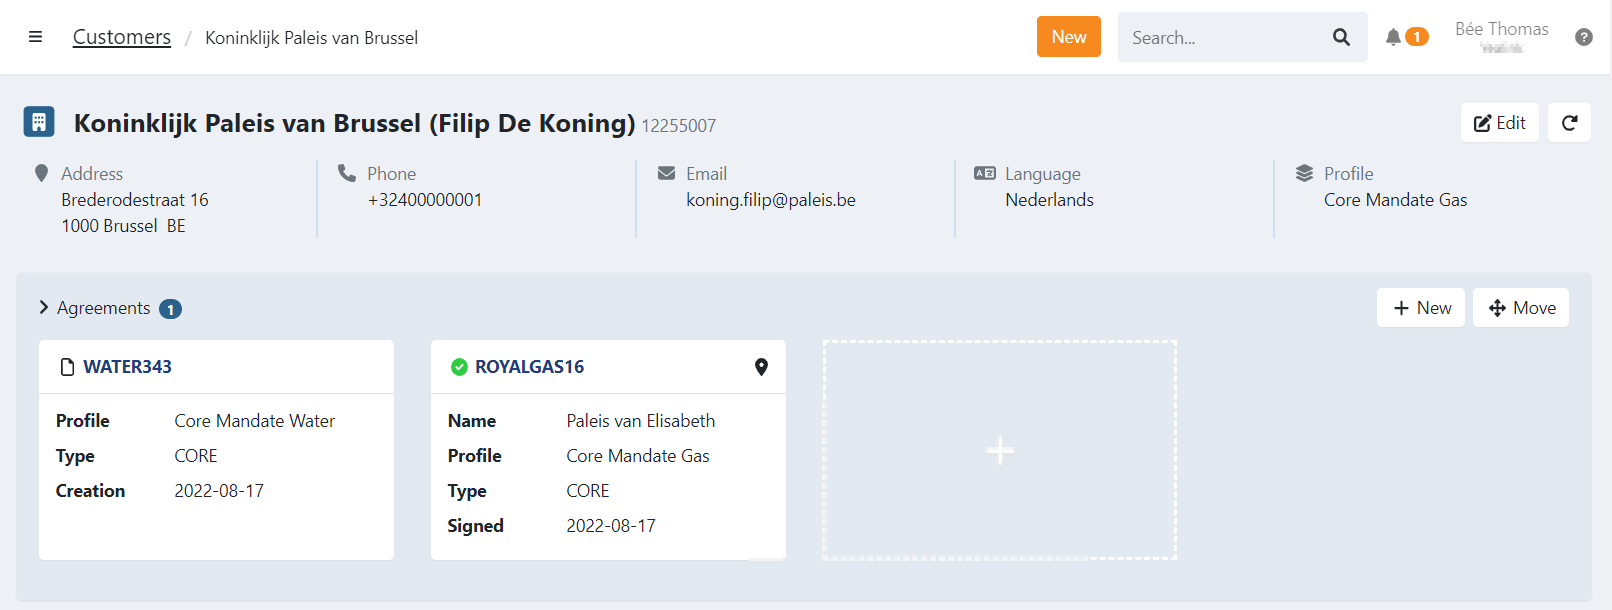
Under the contact information you have the agreements of the customer.
For each agreement we display:
- the state:
- Pending
- Awaiting bank approval
- Requires more signatures
- Awaiting merchant approval
- Printed
- Signed
- Cancelled
- icons indicating:
- Address registered on the agreement is different from the customer
- The agreement is registered on a company when the customer is a person
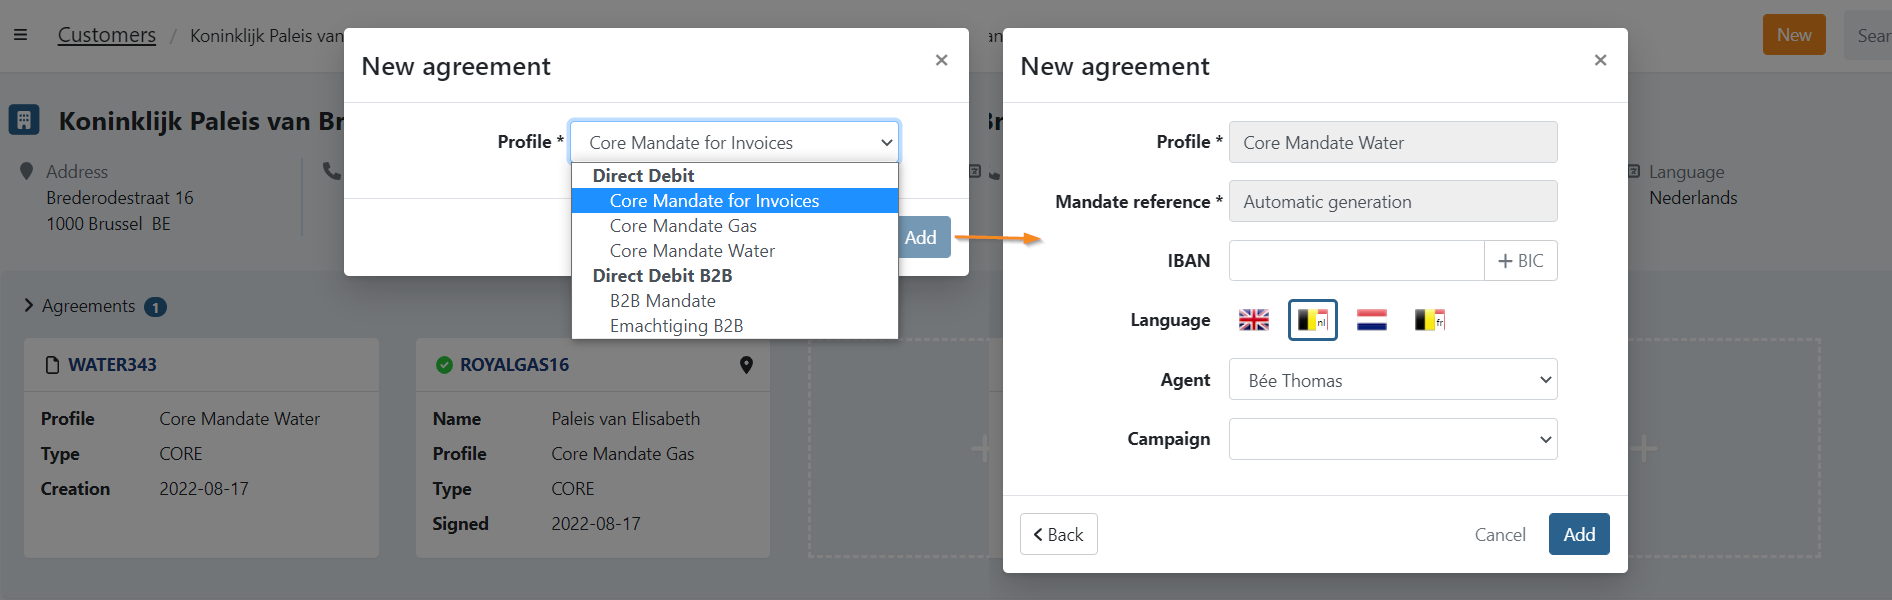
Create a new Agreement
To create a new agreement for the customer, you can use the new-button:
or click on the new square: .
- Click on 'New': The New agreement modal appears
- Select for which profile you want to create a new agreement
- Fill in the details:
- Mandate reference: Automatically generated or manual input depending on the profile-configuration
- Manual input: The reference cannot start with the prefix of the profile.
- IBAN: account number (optional)
- Language: The language of the agreement. Defines in which language communication is sent for this document
- Only active languages of the profile are available. Go to your profile-settings to enable or disable languages.
- Agent: The user managing this document
- Campaign: Link the agreement to a campaign (optional)
- Mandate reference: Automatically generated or manual input depending on the profile-configuration
- Click on 'Add' to create the new agreement
Move Agreement to another customer
A document can be moved to another customer:
- Click on the button
- Select the document you want to move
- Search for a customer or create a new one
** Create a new customer: after the creation you need to restart the move. - Confirm the move
- The document is now moved to a different customer
For more details on how moving agreements, read our article: Move Agreements
Events
A quick overview of events for all the agreements can be found here:
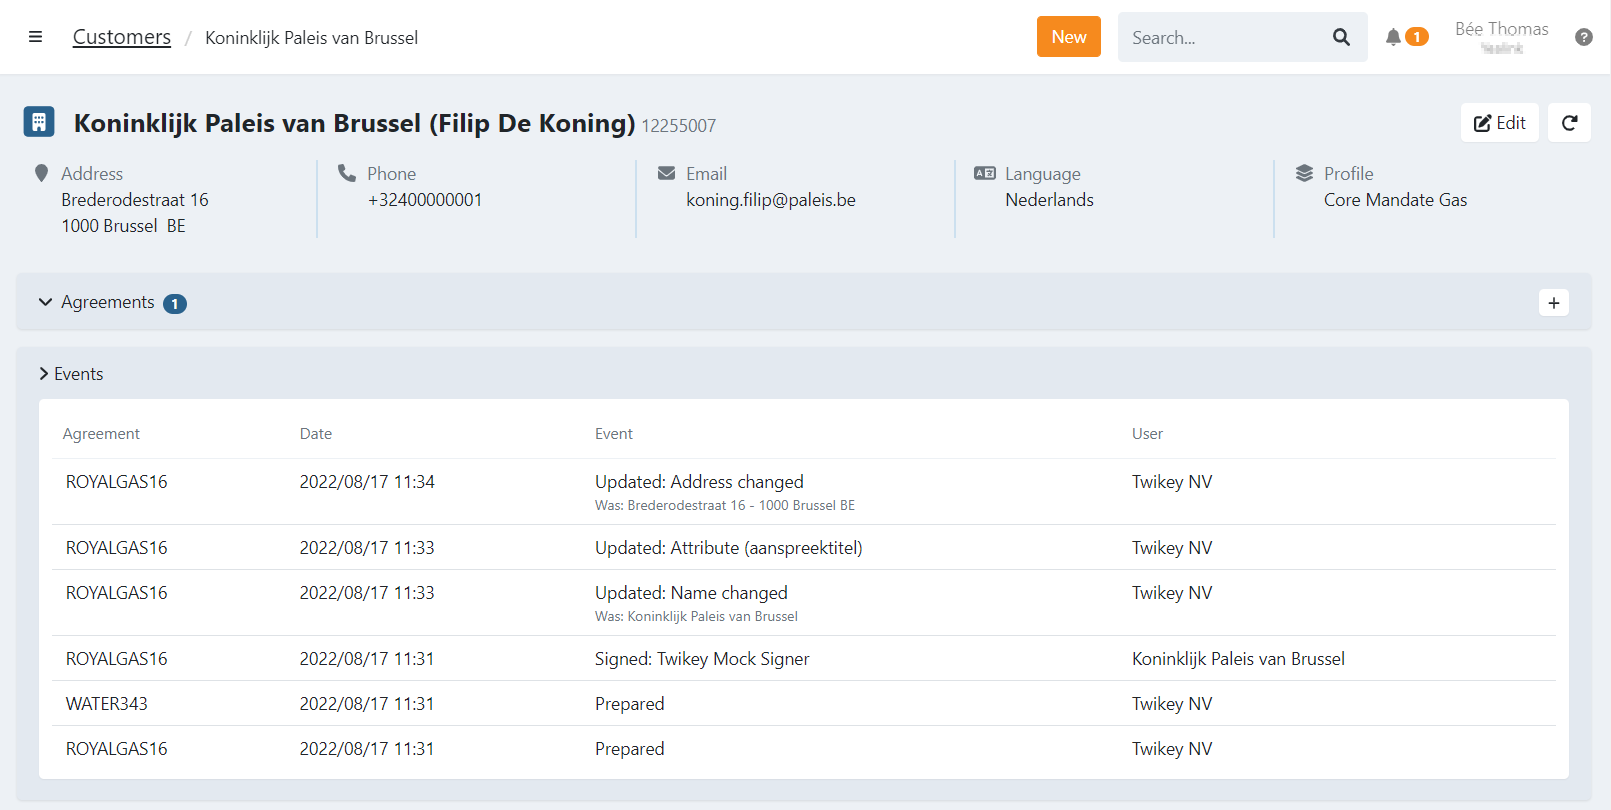
On the left you can see for which agreement followed by the date and time, the event and by whom.
Recent Invoices
The invoice tab provides a list of recent invoices with their status. You can use the states on top to filter.
The list is limited, to see all invoices click on 'Show all'.
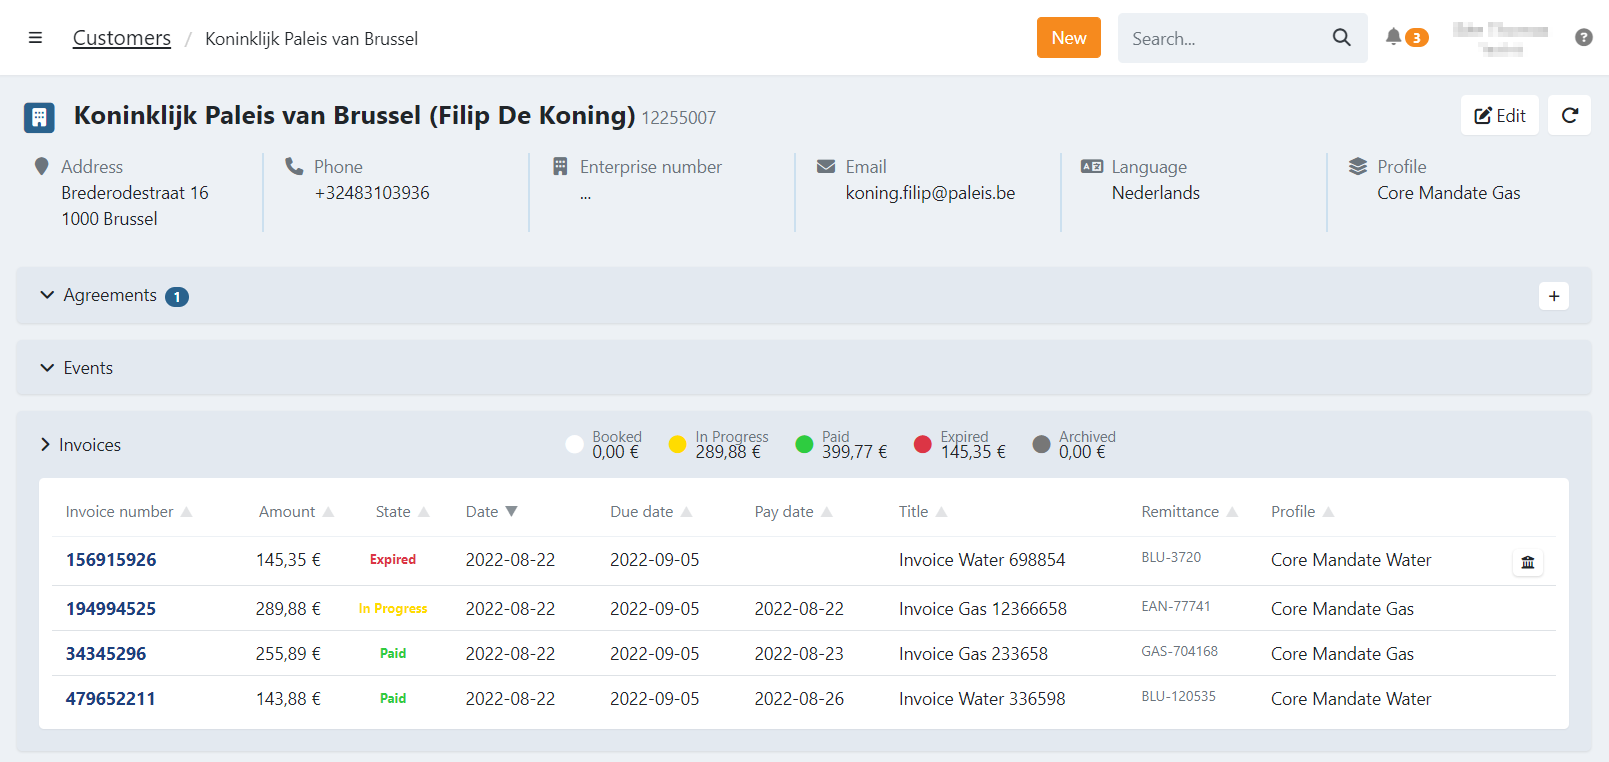
Filtering invoices by their state
You can filter invoices by the following states:

Here's the provided HTML content rewritten in Markdown:
- Booked: the invoice is booked
- In Progress: the invoice payment via Direct Debit is pending
- Paid: the invoice is paid successfully
- Expired: the invoice was not paid before the due date
- Archived: the invoice was archived by a user
Link invoices to a signed agreement
When your customer has a signed agreement, you can add invoices to it in order to collect the amount via Direct Debit. To collect the invoice via an agreement:
- Click on the Create transaction button next to the invoice
- A new modal opens where you can select the agreement and requested collection date.
- Click on
- The invoice will change to the state 'In Progress' and a transaction is ready under Transactions > To be sent.
- Go to your profile-settings
- Go to the Invoices tab
- Enable the option 'Collect the invoice ... days before due-date'
- Set the days to 0 and save the profile
Recent Transactions
Here you can see a list of recent transactions, the status and create new transactions.
The list is limited, to see all transactions click on 'Show all'.
![]()
Transaction list
On this overview you have different options:
- Filter the transactions based on the state
- Click on the agreement to view it's details
- Click on the error code to display more information
- Click on the requested collection date to go to the batch details
- Click on the transaction to display the details and options
Filtering transactions by their state
You can filter transactions by the following states:
![]()
- Open: transactions that have been created but have not been sent to the bank yet and transactions that have been prepared for recollection
- Offered: transactions that have been sent to the bank but for which no feedback has been received yet
- Paid: transactions that have been paid successfully
- Failed: transactions that could not be collected
Create a new transaction
To create a new transaction click on the new-button :
- a list of available (collectable) agreements is displayed
- select the right agreement
- the new transaction modal opens
- to display more options click on 'advanced' (optional)
![]()
- Amount: required amount
- Communication to debtor: message displayed on the bank statement
- Required collection date: the date on which you would like to collect the transaction
- none: the transactions is ready to be sent to the bank immediately
- selected: the transaction will be presented to be sent to the bank approximately 2-3 days before the selected date
- Your reference: personal reference to the transaction
- Place of purchase: when left empty the default is 'web'
Payment links
A list of payment links is displayed on this view.
- Create a new link for this customer using the new-button
- Archive a link using the Archive icon
- Display archived payment links by clicking on 'View archived'
- Undo archive by clicking on the Undo icon
Refunds
On the refund tab you can:
- View refunds
- Add Beneficiary accounts
- Edit a Beneficiary account
- Edit the BIC code if necessary (certain banks require a full 11 character BIC code to accept a refund batch)
- Suspend the beneficiary account by clicking on Suspend
- Reactivate a suspended beneficiary by clicking on Reactivate
- Suspended beneficiary accounts are
striked trough
- Suspended beneficiary accounts are