
About Payment Links
- Requirements
- Payment links overview
- Search bar and filters
- Standard preset filter
- Advanced filter
- Utility buttons
- Payment link list
- Payment link details
A payment link, also referred to as a Request to Pay, is an easy way to request a one-time payment from a customer. Payment links can be created directly in the Twikey interface, imported via CSV, or generated through the API.
You can also use payment links within Twikey's smart failure management system to recover payments from failed Direct Debit or Recurring Credit Card transactions by sending a link via email or SMS.
Requirements
Payment links require that the corresponding payment method is activated in Twikey.
Payment links overview
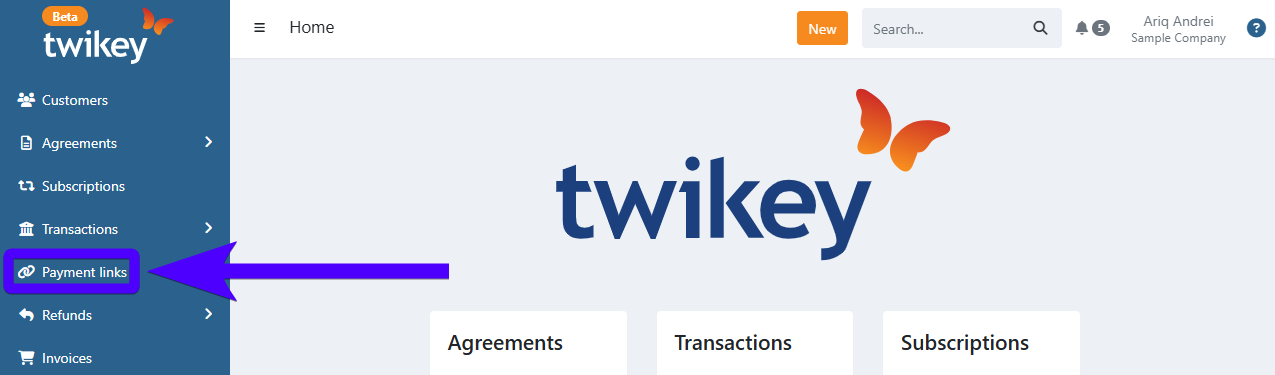
Navigate to Payment links in the left-hand navigation menu to open the overview.
The overview is divided into three areas:
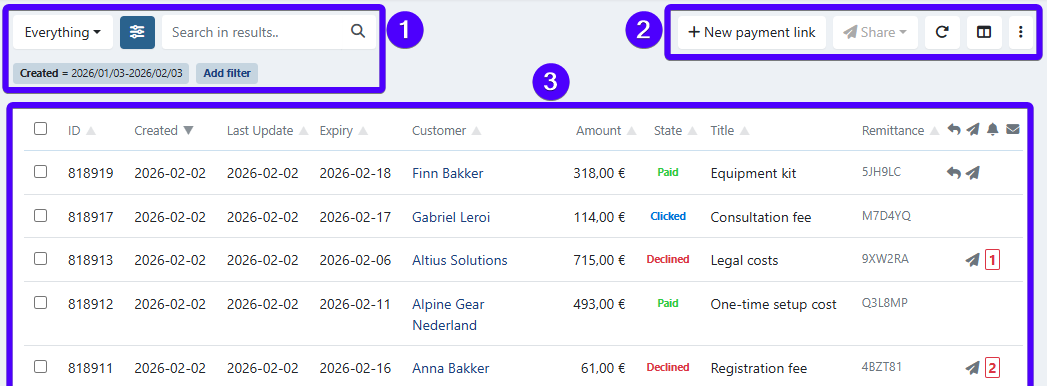
- Search bar and filters — find and narrow down payment links.
- Utility buttons — create, send, import, export, and archive.
- Payment link list — the results based on your current search and filter settings.
Search bar and filters
Use the search bar to find a specific payment link. Use the filters to narrow the list by state, customer, amount, or other attributes.
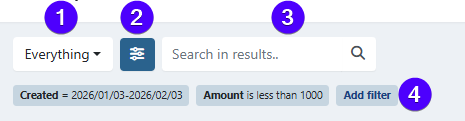
- (1) Standard preset filter — quick filter by common states (see below).
- (2) Advanced filter — filter by specific attributes (see below).
- (3) Search bar — search by payment link ID or customer.
- (4) Active filters — shows which filters are currently applied. Click Add filter to add more.
Standard preset filter
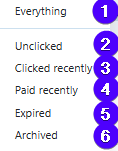
- All — show all payment links.
- Unclicked — payment links not yet opened by the customer.
- Clicked — payment links that have been opened.
- Paid — payment links that have been paid.
- Expired — payment links that have passed their expiry date.
- Archived — payment links that have been archived.
Advanced filter
Use the advanced filter to narrow results by specific attributes.
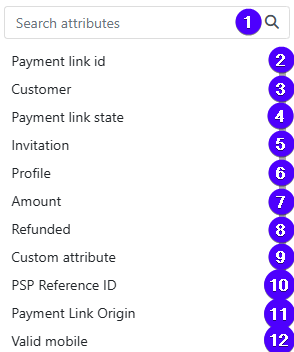
- (1) Search — search for an attribute by name.
- (2) ID — filter by payment link ID. The ID is shown in the leftmost column of the list.
- (3) Customer — filter by customer.
- (4) State — filter by state.
- (5) Sending status — filter by whether the link was sent, and by which channel (email, SMS, or letter).
- (6) Profile — filter by profile.
- (7) Amount — filter by payment amount.
- (8) Refund — filter whether the payment link has a refund.
- (9) — not applicable for payment links, ignore this option.
- (10) PSP Reference ID — filter by PSP Reference ID.
- (11) Origin — filter by origin.
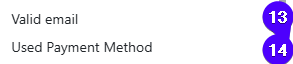
- (12) Mobile number — filter whether the customer has a valid mobile number.
- (13) Email address — filter whether the customer has a valid email address.
- (14) Payment method — filter by payment method.
Utility buttons
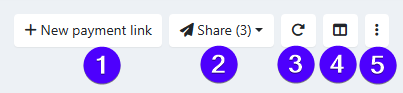
- (1) Create — create a new payment link.
- (2) Send — send invitations to selected payment links. Select at least one payment link first.
- (3) Reload — refresh the list.
- (4) Columns — choose which columns are visible.
- (5) ⋮ — additional actions:
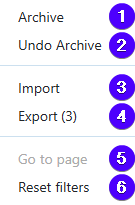
- Archive — archive selected payment links.
- Unarchive — restore archived payment links.
- Import — import payment links from a CSV file.
- Export — export selected payment links.
- Go to page — jump to a specific page in the list. Only available when the list has more than one page.
- Reset filters — clear all active filters.
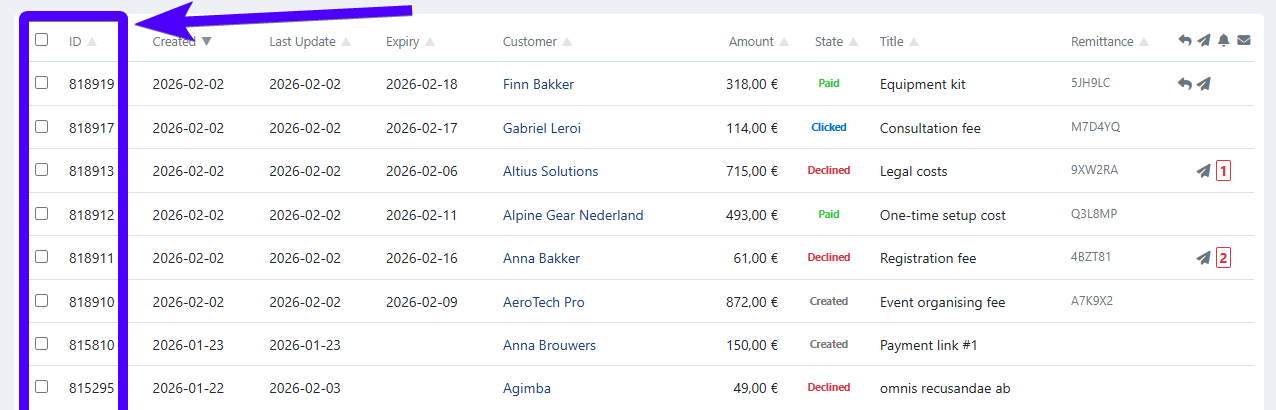
Payment link list
The list shows all payment links that match your current search and filter settings.

You can choose which columns are shown using the Columns button. Available columns:
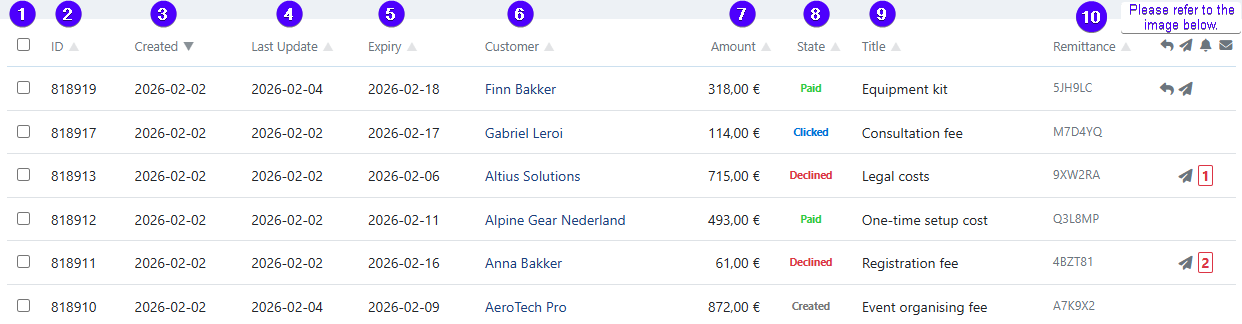

- (1) Checkbox — select one or more payment links. Use the top checkbox to select all.
- (2) ID — unique identifier of the payment link.
- (3) Created — creation date.
- (4) Last activity — date of the most recent action (e.g. when the link was sent).
- (5) Expiry — expiry date, if set.
- (6) Customer — the targeted customer.
- (7) Amount — the payment amount.
- (8) State — the current state of the payment link.
- (9) Title — the payment description shown to the customer.
- (10) Remittance — the payment reference.
- (11) Refund — whether the payment link has been refunded (partially or entirely).
- (12) Sent — whether the link has been sent (via email, SMS, or WhatsApp).
- (13) Reminder — whether a reminder was sent. The number shown indicates the last reminder level (e.g. "3" means reminder #3 was sent). Learn more about reminder sequences.

- (14) Invalid email — whether the customer has an invalid email address.
Payment link details
Click a payment link in the list to open its details — states, share options, field explanations, and refunds. See the payment link details article for a full overview.