
Setting up a mandate conversion campaign
- Requirements
- Create a new campaign name
- Create a campaign for existing customers
- Create a campaign for new customers
- Adding a prepared agreement to an existi...
- Managing your campaigns
- FAQ
Show me
To encourage customers to sign a mandate, you can launch a "conversion" campaign. The campaign tool enables you to closely monitor your target audience's response to specific campaigns, compare various approaches, evaluate the effectiveness, or just maintain a clear track of campaign progress.
Requirements
- An active mail integration
- Verify your mail/text messages (SMS) content
Email configuration
In order to use the campaign functionality, it's crucial to establish the mail integration. Please verify if your email is configured by navigating to Settings -> Integrations. If the email icon is highlighted in green, it indicates that the email configuration is successfully set up.
![]()
More information about setting up your mail integration can be found here.
Email content
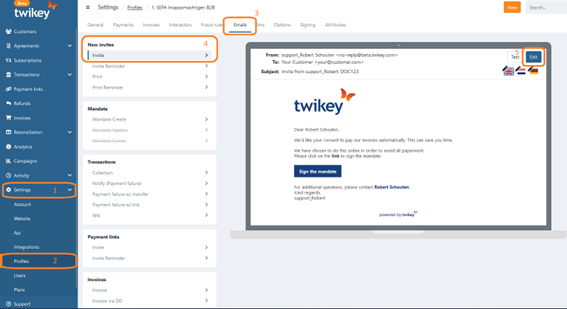
For optimal customer engagement, it's essential to customize the content of your invitation mail text. Navigate to settings and select the relevant profile. Click on the tab "Emails" and select "Invite". You can now choose "Edit" to edit the content of your invitation mail. It is also possible to add HTML in the email.
To get the best responses from your customers we highly recommend you to edit your invite email text. You can do this in your profile settings. Go to settings -> profiles and select the profile you want to use. Click on the tab "Email" and select "Invite". You can now choose for "Edit" to edit the invite email. You can also insert HTML code into the email for additional customization and design flexibility.
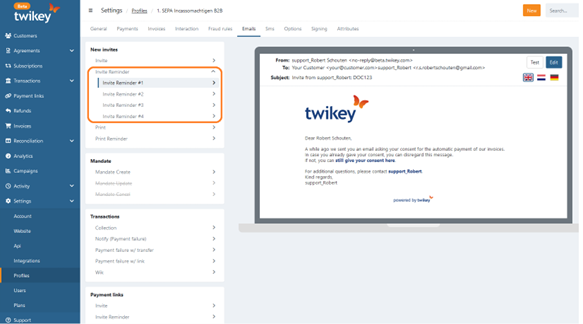
The same customization options apply to reminder emails as well, with the flexibility to create up to four different reminders. You can craft unique emails for each language variant if needed.
Note that you can also add standard or custom variables in your email text. An overview of the standard variables can be found here
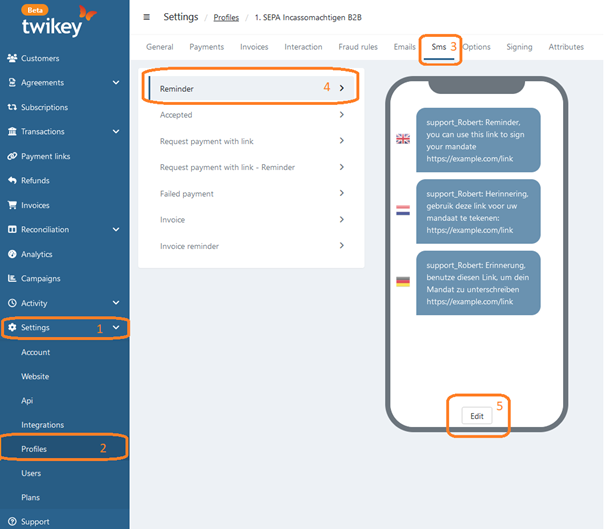
Text messages (SMS) reminder content
You can also send reminders via text messages. To customize the text, navigate to profile settings and select the SMS tab. Then select "Reminder" > "Edit" to modify the content.
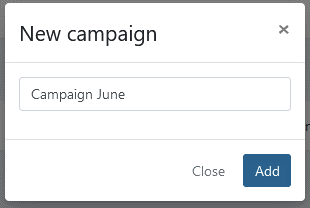
Create a new campaign name
To create a campaign, access the campaign section from the left menu. Then click the "New" button located at the top right corner.
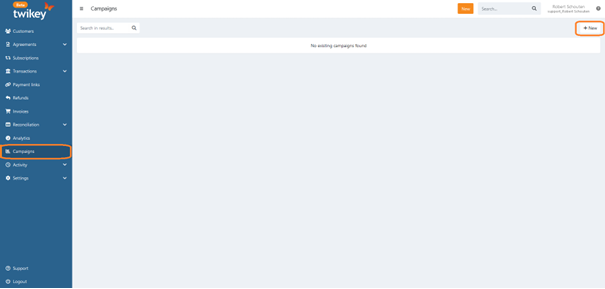
Give your campaign the desired name and click "Add".
Create a campaign for existing customers
- Navigate to the customers section in the left menu.
- Select the customers you wish to invite using the available filters.
- Click on the "Invite" button (the number of invitations is displayed).
- Choose the desired profile and select your campaign or create a new one.
- Press "Send" to create the campaign and send out the invitations immediately.
After sending the invitations, you will be redirected to the campaign menu where you can see the overview of your campaign.
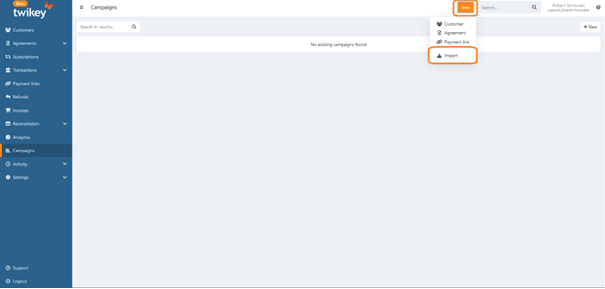
Create a campaign for new customers
To create a campaign for new customers, the customers must first be created in Twikey.
This can be done manually or by importing a .CSV file containing the customer data. You can find the empty customer .CSV file here.
- Download the customer .csv file
- Fill in all known customer data (an email is required, the more data is prefilled the less data our customer will need to enter during the signig process)
- If the invitations are to be added to an existing campaign, enter the campaign name for each record in the campaign column (if the header does not exist you can add it yourself)
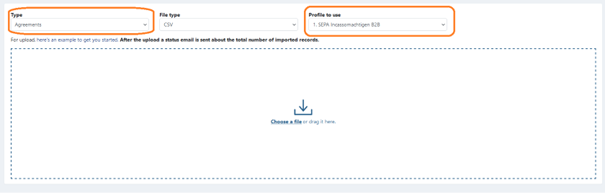
- Import the file by clicking the orange button and select "Import".
- Change the type to "Agreements" and select the profile you want to use. If you have multiple profiles, ensure you choose the correct one to send out the appropriate invitation email.
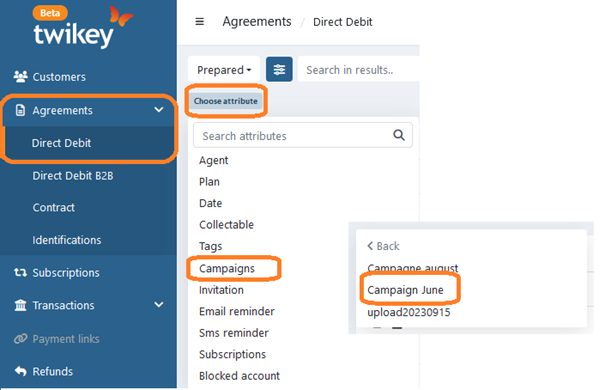
Adding a prepared agreement to an existing campaign
- Navigate to the existing prepared agreement
- Click edit and select the desired campaign
- You are redirected to the agreement overview, click on the campaign name to navigate to the campaign
Note : this can not be done in bulk, please download and upload again with a campaign field
Managing your campaigns
More information about managing your campaigns can be found here.
FAQ
Is it possible to apply a filter to see which customer has not received an invite/reminder yet?
If you want to have an overview of customers that have not received a reminder you can go to "Agreements" and select 2 filters:
Select "Choose attribute" and then "Campaigns" and then select the campaign on which you want to have an overview of.
The second filter can be set on invitation or email reminder.
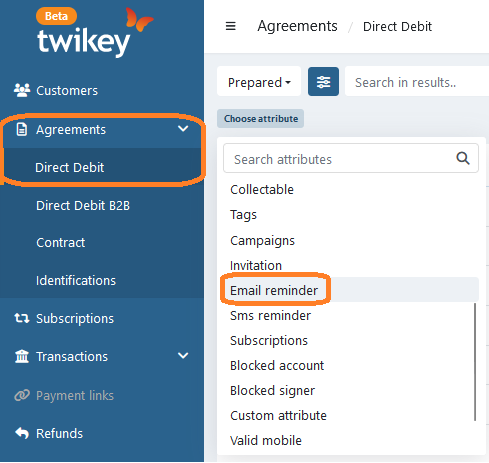
You now get a selection of customers based on your filters.
How to add attributes to a mandate?
You can add other attributes to a mandate PDF. This is done via Settings -> Profiles -> Attributes. More information about this can be found in this support article