How to view customer details
- The basic information section
- The agreements section
- The events section
- The subscriptions section
- The recent invoices section
- The recent transactions section
- The payment links section
- The refunds section
There are several ways to reach the customer details interface. Below, you'll find the simplest way to reach this interface.
- Click on Customers on the sidebar.
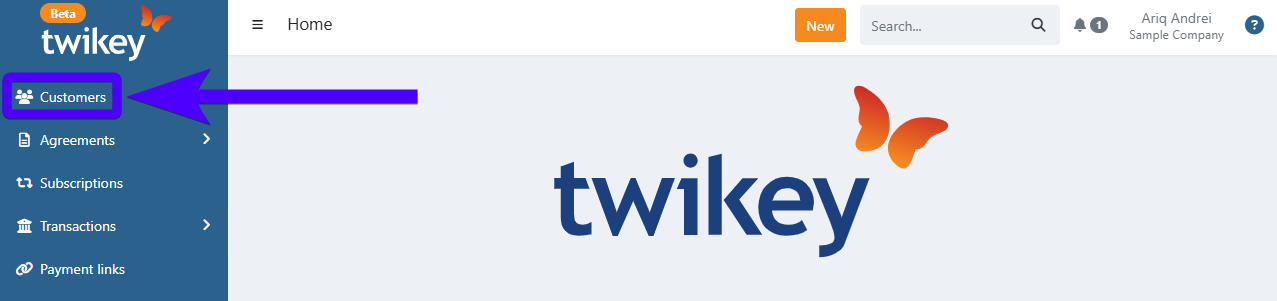
- Find the selected customer and click on their name.
The customer details interface appears as follows:
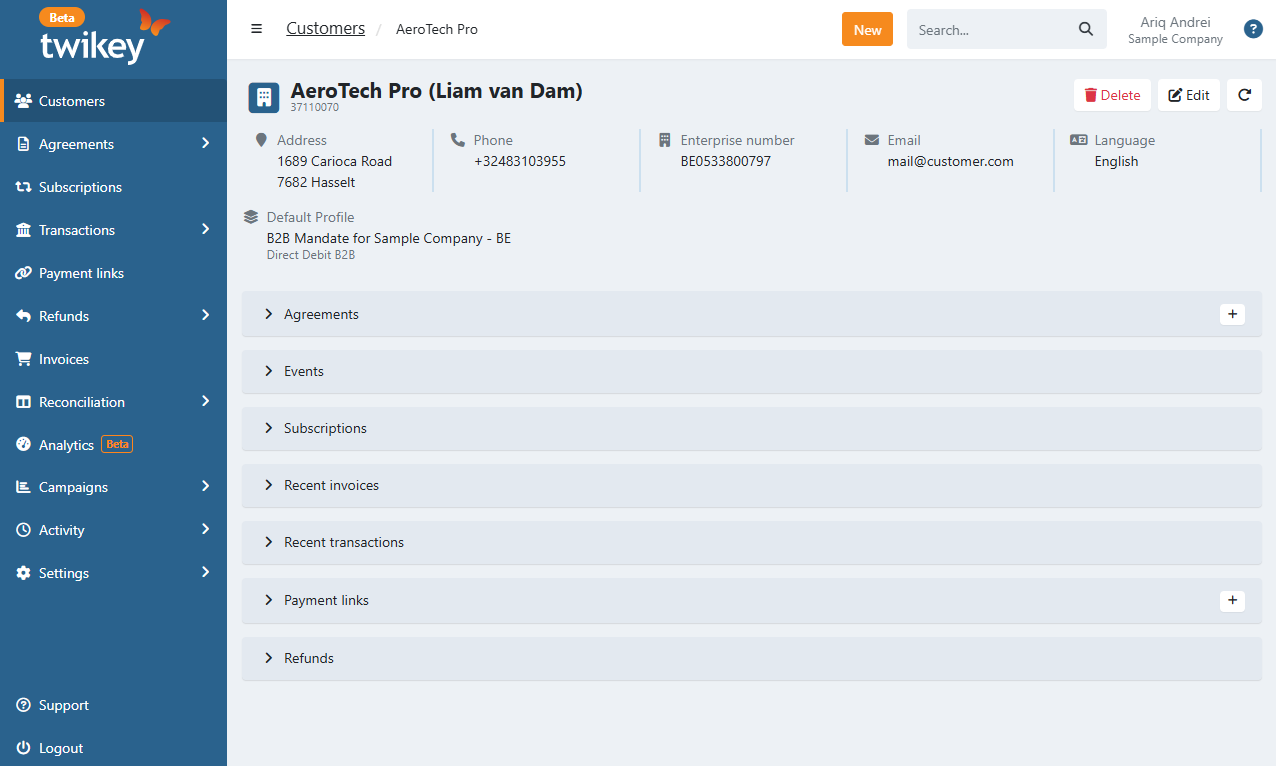
Below, you can find the explanation for every part of this interface.
The basic information section
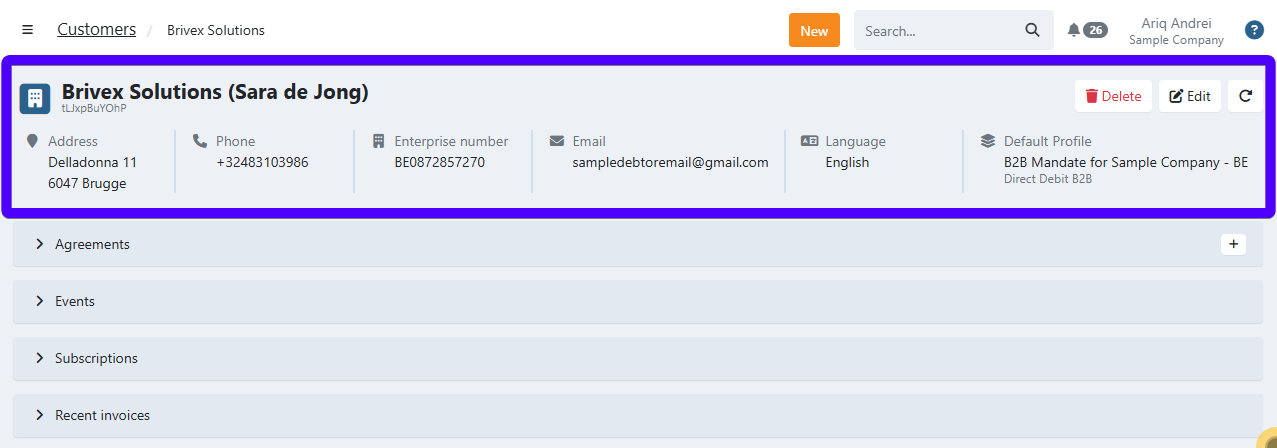
On the top of the customer details interface, you can see the basic information of the customer.
In addition to the basic customer information, there are several other important items from this section that are important to familiarize yourself with:

- This icon indicates whether the customer is a person-type customer or a company-type customer. The person icon indicates a person-type customer, while the building icon indicates a company-type customer.
- This is the default profile that will be used for agreements with this customer.
- Click to delete the customer.
- Click to edit the customer.
- Click to refresh the page.
The agreements section

Here, you can find all of the agreements that are associated with this customer. Additionally, you can also find buttons to add a new agreement and to move an agreement to another customer.
Here's the list of all agreement states and icons (you can click on the image to enlarge it):
![]()
You can find the explanation for all agreement states here.
The events section
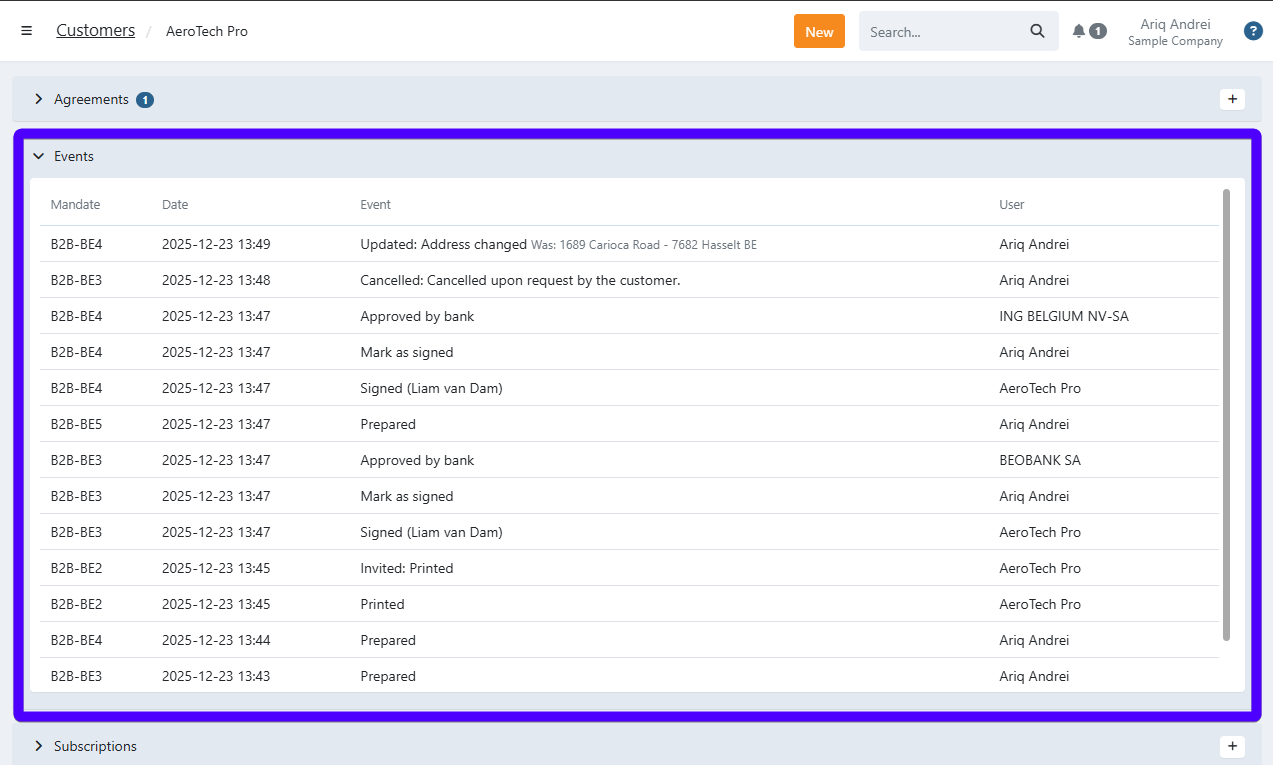
Here, you can find the log of all of the events that involve this customer. Here's an explanation of each column in this table:
- Mandate: The relevant mandate related to the event.
- Date: The date & time of the event.
- Event: The event description (an explanation of what happened).
- User: The name of the party that initiated the event.
The subscriptions section
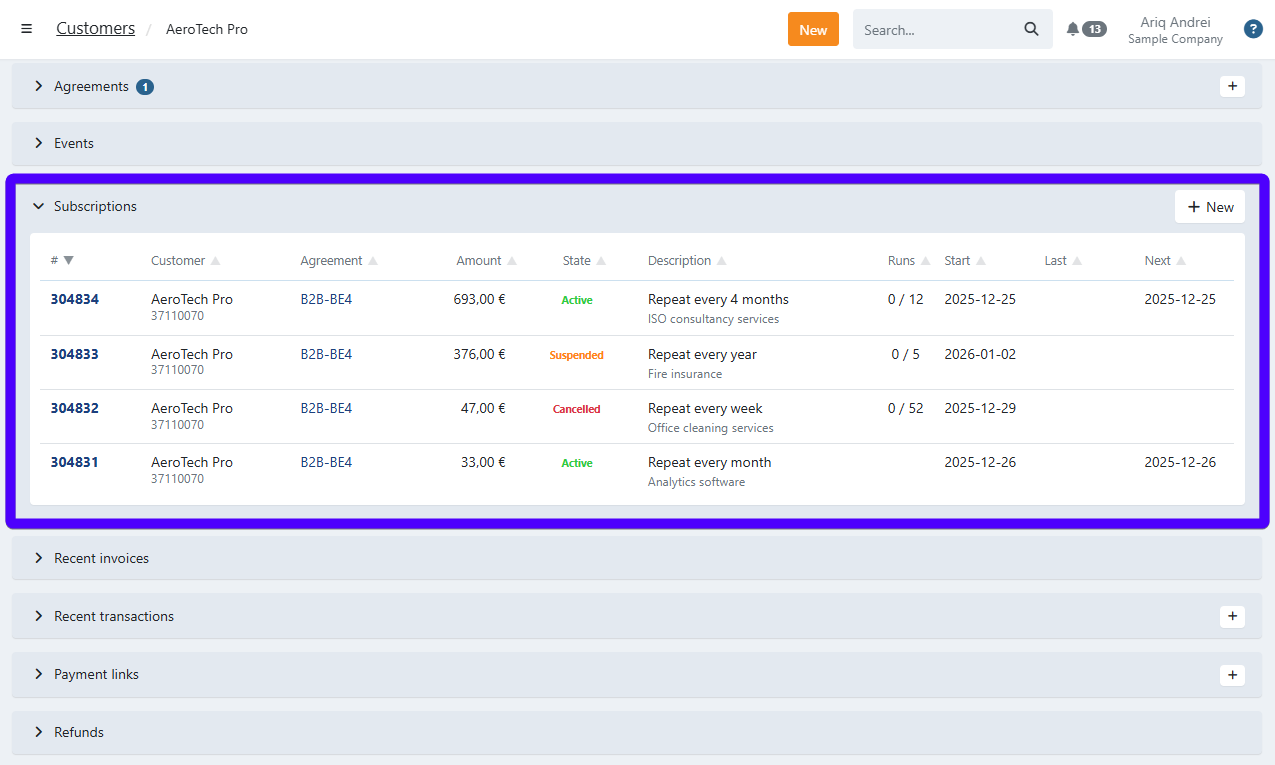
Here, you can find all subscriptions that involve this customer. Here's an explanation of each column in this table:
- #: The subscription number.
- Customer: The name of the subscription customer (their customer number is listed underneath).
- Agreement: The agreement that is associated with the subscription.
- Amount: The amount of the subscription.
- State: The subscription's state. Under this list you can see the possible subscription states.
- Description: The frequency of the subscription, as well as its description.
- Runs: A subscription run is the scheduled execution of all recurring subscription actions for a given period. If the subscription is set to be permanent, then the subscription run will remain empty here.
- Start: The start date of the subscription.
- Last: The date of the previous subscription billing.
- Next: The date of the next subscription billing.
Possible subscription states:
- Active: The subscription is active.
- Suspended: The subscription has been suspended. It can still be reactivated.
- Cancelled: The subscription has been cancelled. It can no longer be reactivated.
- Closed: The subscription is closed, all executions are done.
Additionally, you can also find a button to create a new subscription.
The recent invoices section
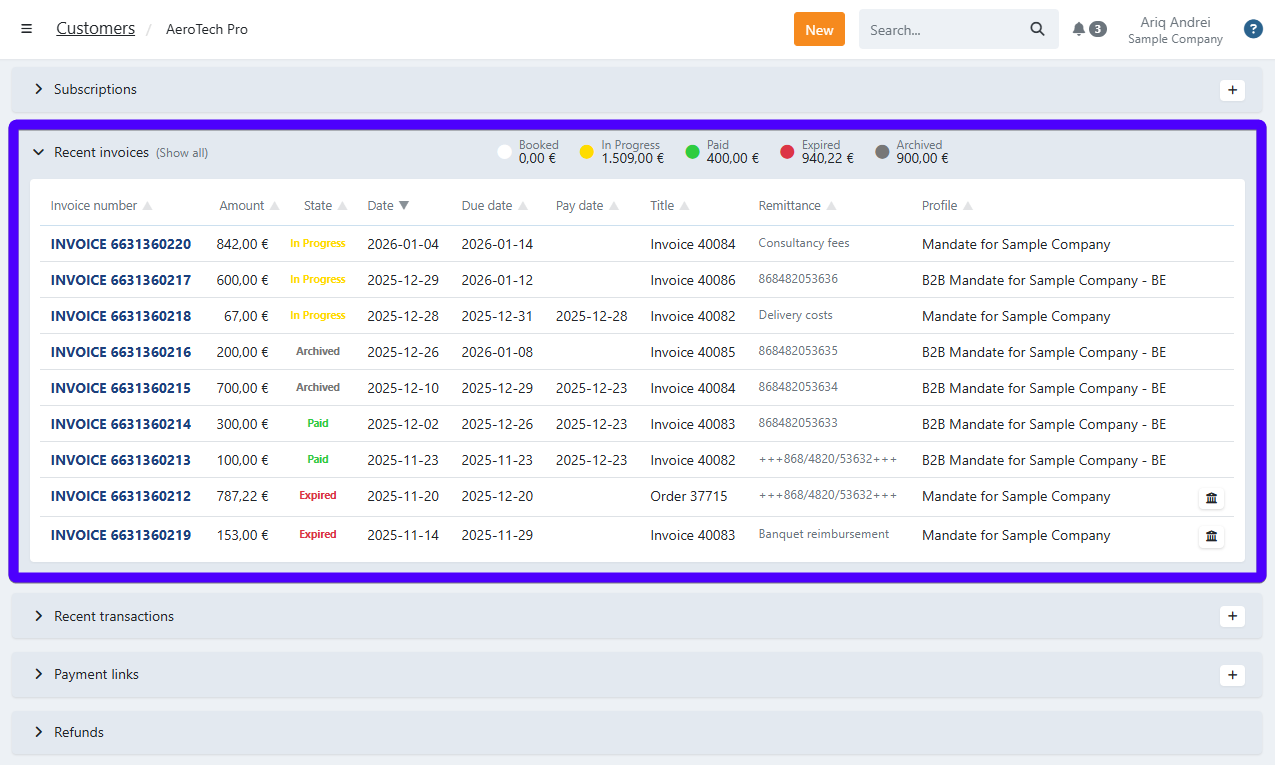
Here, you can see all of the invoices that are related to this customer. Please be aware that this section only displays the most recent invoices, and not all invoices of this customer.
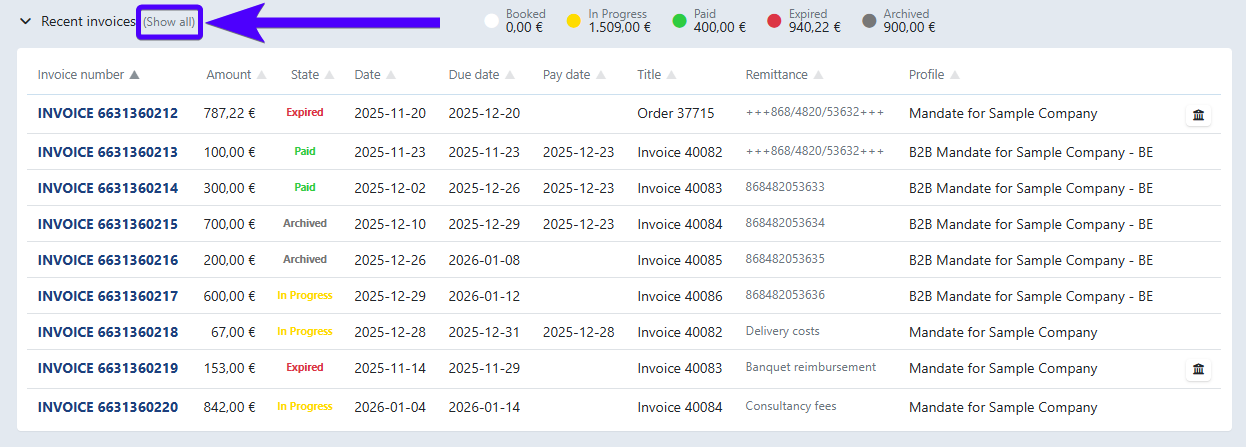
In order to see all invoices, click on Show all, as shown in the image below:
Filtering invoices by their state
You can also filter invoices based on their state. To do so, simply click on one of the invoice states, as shown in the image below:
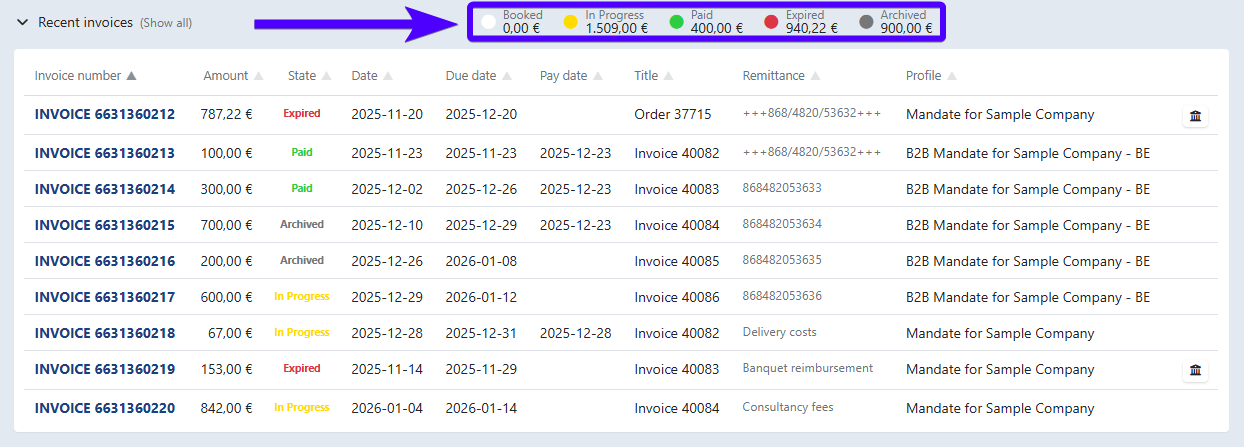
Here's an explanation of all invoice states:
- Booked: The invoice has been booked.
- In Progress: The invoice payment via direct debit is still pending.
- Paid: The invoice has been paid successfully.
- Expired: The invoice hasn't been paid as of the due date.
- Archived: The invoice has been archived by a user.
Additionally, you can also create a transaction from an invoice on this section. Click here to learn more about it.
The recent transactions section
![]()
Here, you can see all of the transactions that are related to this customer. Please be aware that this section only displays the most recent transactions, and not all transactions of this customer. In order to see all transactions, click on Show all, as shown in the image below:
![]()
Moreover, you can also create a transaction from this interface. Click here to learn more about it.
Filtering transactions by their state
You can also filter transactions based on their state. To do so, simply click on one of the transaction states, as shown in the image below:
![]()
Here's an explanation of all transaction states:
- Open: Transactions that have been created but haven't been sent to the bank yet, or transactions that have been prepared for recollection automatically because of your dunning workflow.
- Offered: Transactions that have been (re)sent to the bank but no feedback has been received yet.
- Paid: Transactions that have been paid.
- Failed: Transactions that cannot be collected, but alternative (dunning) steps will be taken.
- Unsettled: Transactions that couldn't be collected. There are three possible reasons:
- No dunning workflow has been set.
- All of the dunning steps have been completed and the transaction still couldn't be collected.
- Collections are not possible for this account, for example because the account number is incorrect or the account has been closed. You can find a list of the possible error codes here.
The payment links section
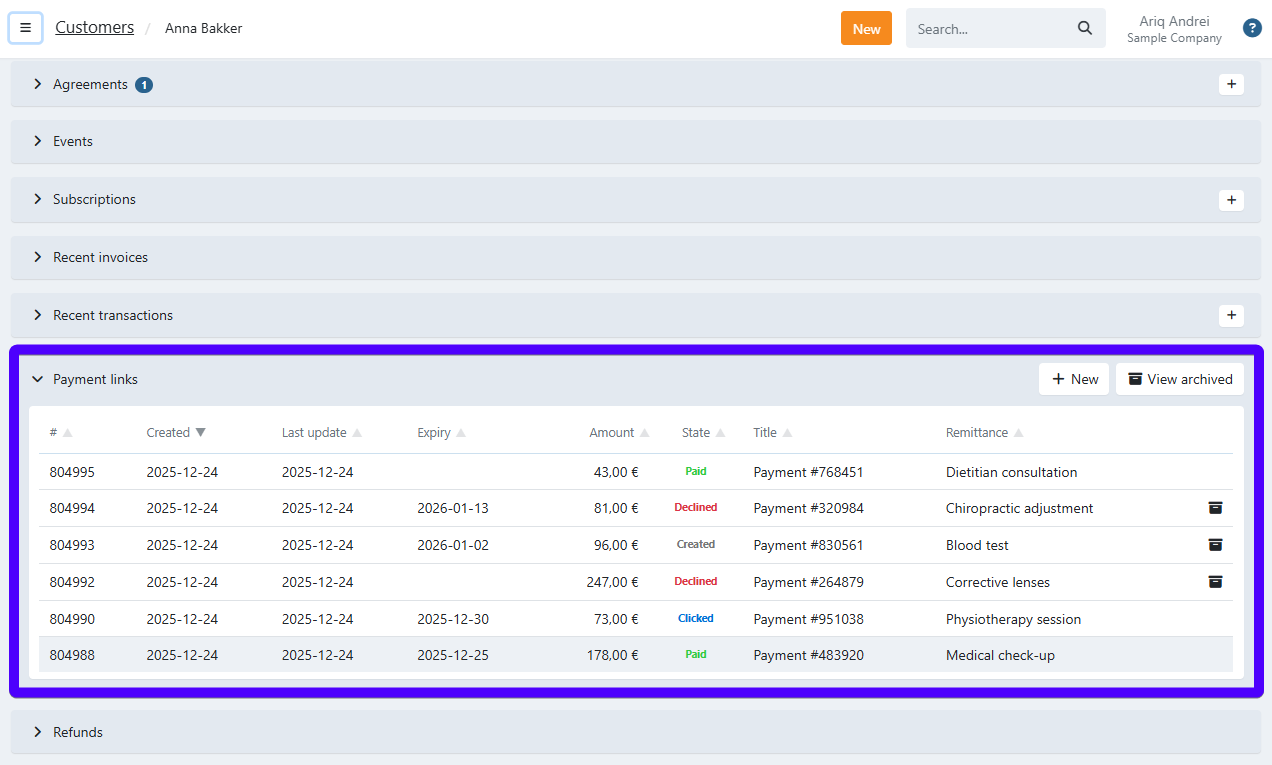
Here, you can see all payment links that are related to this customer.
To archive a payment link, click on the archive icon as shown on No.1 in the image below. To view archived payment links, click on the View archived button, as shown on No.2.
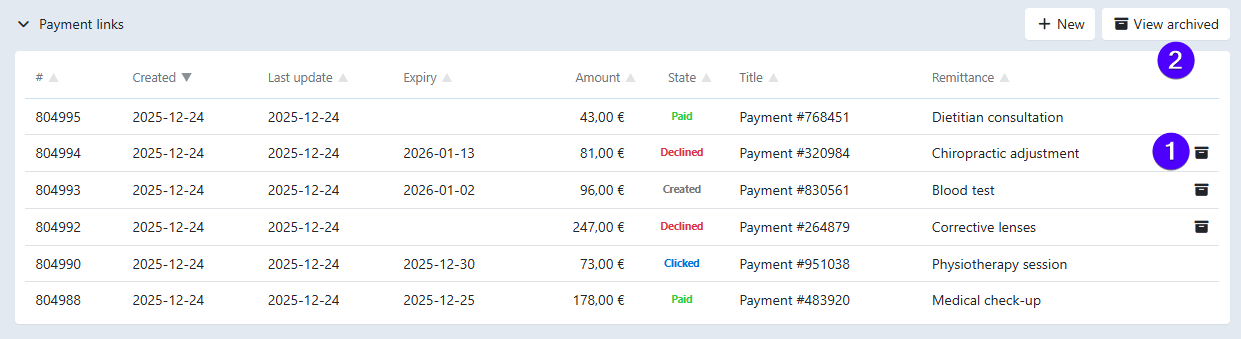
Below, you can find an explanation of all payment link states.
- Created: The link has been created.
- Clicked: The link has been opened by the customer, but not yet paid.
- Pending: A payment is pending.
- Paid: The link has been paid.
- Expired: The expiry date has passed, yet no payment has been received.
- Declined: The payment has failed (can be due to the customer's rejection or due to technical reasons.)
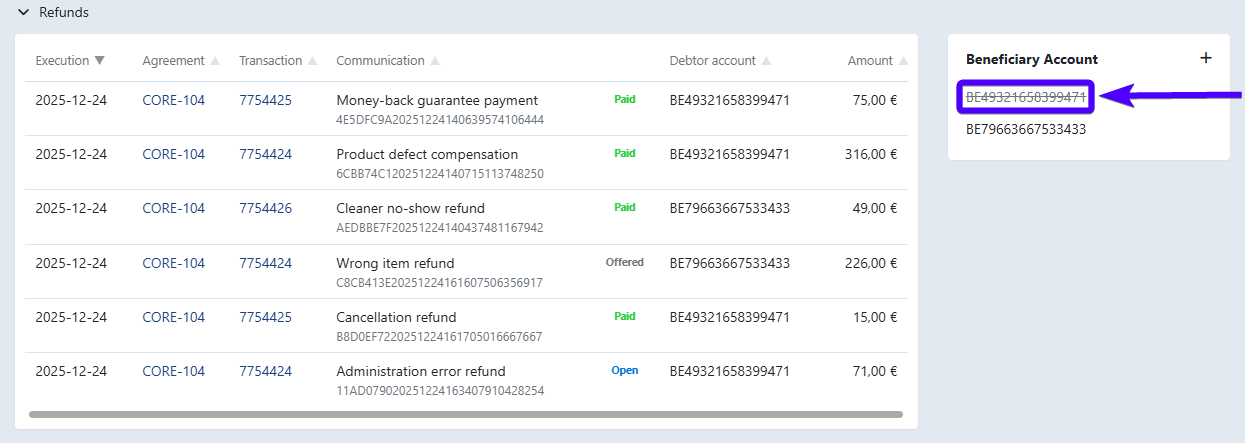
The refunds section
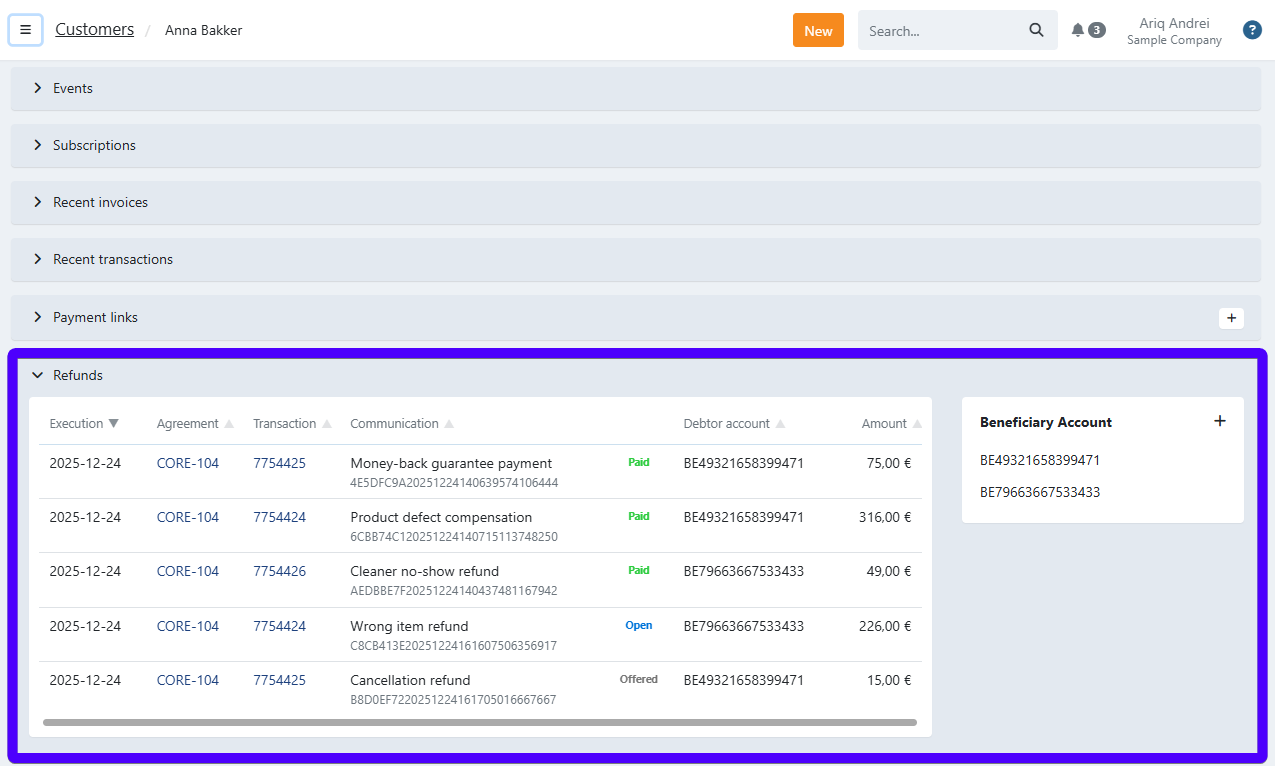
Here, you can see all refunds that are related to this customer.
Managing beneficiary accounts on the refunds section
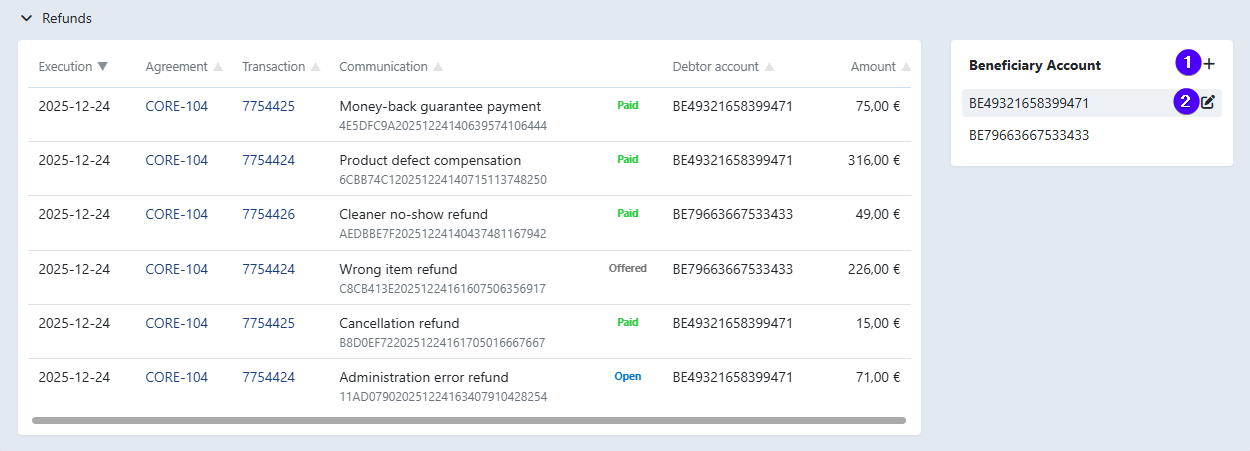
- Click on the plus icon to add a new beneficiary bank account.
- Click on the edit icon to open a modal. There, you can edit/suspend/reactivate the selected bank account. Suspended beneficiary bank accounts are striked trough, as shown in the image below.